Monday, October 10, 2011

DIY Blast Gun

I ordered some rubber trim and special "glass locking" trim from McMaster Carr for the blast cabinet. If you've never ordered from McMaster Carr, you should check out their web site. The best industrial supply web site hands down.

While waiting for the trim,  I took a closer look at a cheap blast gun I bought. Its kind of clunky.


My blast cabinet is a little small so maybe I can make something better with this little blow gun.


Below is a 1/8" pipe tee fitting, a 1/8" pipe/tube adapter and the tip from the small blow gun.


Fit them all together and we've got a nice little blasting gun.

Friday, October 7, 2011

DIY Soda Blaster

Now that the engine is completely apart, I started thinking about how to clean it. At first I though that I would have to scrub and scrub with a solvent until she shined up. In the mean time, I also was learning about soda blasting. Soda blasting is probably the safest way to blast because its almost completely harmless to the engine. It doesn't remove metal and it dissolves in water so clean up is a breeze. Not only that, you can Do It Yourself.

Sounds like a plan!

The two large holes will be where my arms go. The smaller one on the side will be where my shop vac hose goes. It will simply suck out all the left over soda, dirt & dust. The plastic bin maybe a little smaller then the ideal, but I should be able to fit all the engine parts in there.


Now I'm making holes for the air hose and the media blasting hose.

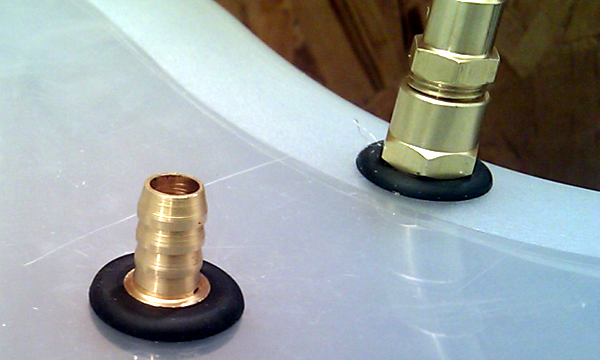
I love grommets. These two fittings are snug as can be in there. The barbed fitting is for the blast media and the larger fitting is a quick connect fitting for the air hose. Doing it this way with the pass thru fittings will make this really portable and convenient to use. "Plug and play", if you will.

Air hose inside the blast "cabinet".


Blast media hose in side the blast cabinet.


Hole cut on top for the window. I need to get some nice rubber edging for these larger openings. This is gonna look really nice when its done!

DIY Valve Compressor

I tried my 4lb dead hammer to knock the valve keepers lose. Didn't work at all. Is it just me or are these kz750 valve springs really really strong? I'd whack it with the dead hammer and the spring wouldn't compress at all.

So I followed what many do to make a valve spring compressor- cut a notch in a socket and use a c-clamp.


In use. At the center, you can see one valve keeper in place. The other fell off and is sitting behind the valve stem.

I knew it would be a tight squeeze. This was the longest socket I had to spare so the notch isn't very big. Just like playing the game "Operation" as a kid. "It takes a steady hand!"


But I got them all out, and everything looks okay to me. I know later on the valves will need special attention.