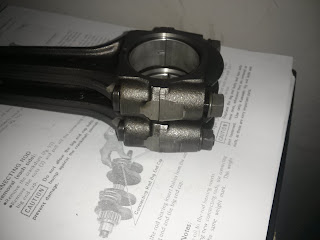
Previously, the bores in the old connecting rods were shown with some pretty significant scoring from the wrist pins. So far, every other lubricated surface in the engine looked pretty decent so I wonder if this part wasn't getting enough oil? Hopefully that will not continue.
Here's the rods getting pulled apart. With just the socket wrench, it took just about all I had strength wise. Then I added the cheater pipe and they came off with barely an effort. Amazing what a little leverage can do. The last few pics just show that there was good lubrication in there and the rod bearings looked good.
Now here's something interesting. The manual shows that there are a few different color coded bearing inserts- black, brown and blue. The markings are supposed to be on the back side but darned if I see anything. I didn't notice any color markings on the replacement rod bearings either. Perhaps it wears off.
Another oddity is that the replacement rods do not have a weight stamp on them like they should. Mine are stamped with a "J". The two rod pieces are machined together and need to be paired together. The stamp helps to match the two pieces. I have no idea if the replacement rods are matched correctly. I'll just have to trust that they are.
*Update* I think the weight markings just wore off. Its not stamped, just ink. The "J" ink on my rods rub off easily. But I'm pretty sure I have the replacement rods on correctly.
And now the new rods are on, torqued to spec. They seem to fit fine. I can only cross my fingers that the bearings are correct and the rods parts are paired up right.


Which bearings did you use there's 3 different part numbers I'm going through the same is she can you please help thank you
ReplyDeleteI'm going through the same issue
ReplyDelete